Introduction
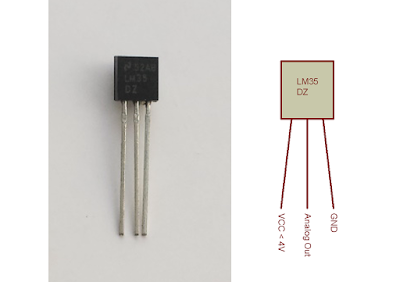
LM35 is an analog temperature sensor creating a linear analog voltage output of 10 mV per degree Celsius with the accuracy of 0.25 degree Celsius. Since the raw temperature data is analog voltage, reading temperature value accomplished by an ADC input of a microcontroller. Reading the temperature from this device is not complex as another digital temperature sensor with SPI, I2C or one-wire protocol.
This temperature sensor supplied the voltage between 4 to 30 V DC. It converts the temperature between -55 to 150 degree Celsius. Since it's linear, the output raw temperature voltage is negative whenever the temperature is below zero degree Celsius. For example, a -1 degree Celsius temperature creates an analog raw temperature voltage output of -0.01 V.
PIC16F88 Programming And Interfacing With CCS PICC
PIC16F88 comes with 10-bit ADC inside. Using a full +5 V voltage reference, the step voltage is 0.0048 V per step of the 1024 digital value. It has seven analog input channels, include it's two external voltage reference pins.
 |
| A reference image of PIC16F88-I/P. I posses one's bought from Futurlec. |
This 18-pin small embedded controller fit to some small project like here.
 |
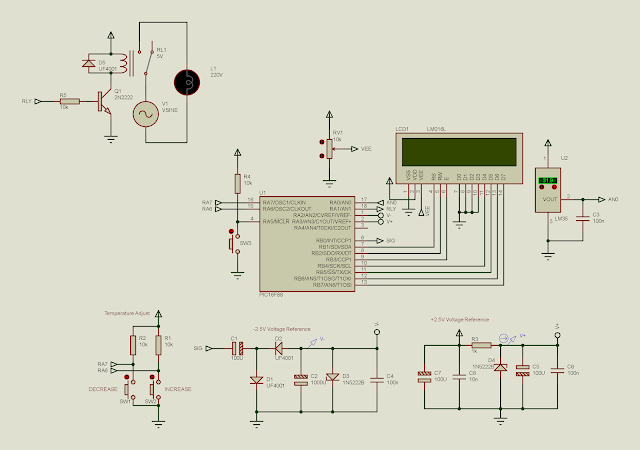
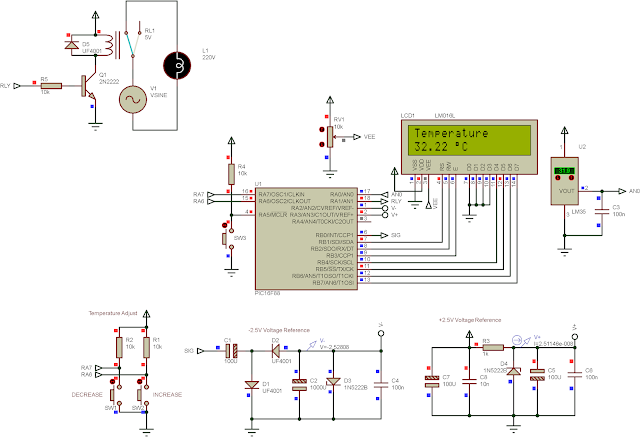
| Schematic Diagram |
From this schematic diagram, I list some basic function of the MCU below.
- Creates an output PWM signal from RB0-CCP1 to fed the negative voltage converter. This negative voltage fed the VREF- pin of ADC Module inside the MCU itself. Because we need to read a negative raw voltage temperature data.
- Read the temperature voltage from LM35 fed to RA0-AN0, and convert it into a readable value in degree Celsius.
- Displays the temperature on a character LCD
- Tests the temperature input with the pre-set value store the the EEPROM. When it exceed the pre-set value, a relay driver connects to RA1 is set high. The preset value could be adjust using two buttons connect to RA6 and RA7, respectively.
Since we require two reference voltage VREF+ and VREF-. It's necessary to create a stable DC voltage. In this case, I only use two 2.5 V zener diodes to stabilize two voltage points:
A positive +2.5 V reference voltage is created from the positive supply voltage VDD of +5 V. Another negative -2.5 V reference voltage is create from a negative -5 V voltage source. This -5 V voltage source created by the negative voltage creator. It's driven by the PWM signal generated by PIC16F88. The signal is 1 kHz in frequency and 10% duty cycles.
C source code lists below.
#include<16F88.h>
#device adc=10
#fuses INTRC_IO,NOWDT
#use delay(clock=8M)
/*Use CCP1 Module with the frequency of
1 kHz and 50% duty cycle*/
#use pwm(CCP1,FREQUENCY=1000,DUTY=10)
#define LCD_ENABLE_PIN PIN_B3
#define LCD_RS_PIN PIN_B1
#define LCD_RW_PIN PIN_B2
#define LCD_DATA4 PIN_B4
#define LCD_DATA5 PIN_B5
#define LCD_DATA6 PIN_B6
#define LCD_DATA7 PIN_B7
#include<lcd.c>
#define INC (input(pin_A6))==0
#define DEC (input(pin_A7))==0
int8 temp=0;
char degree=223;
int16 readAdc;
float temperature;
/*A function to read and convert temperature*/
void tempConvert(void){
readadc=read_adc(ADC_START_AND_READ);
while(!adc_done());
temperature=(readadc*5.0)/1024;
temperature=temperature-2.5;
temperature*=100;
lcd_gotoxy(1,2);
printf(LCD_PUTC,"%0.2f %cC",temperature,degree);
}
/*Restore LCD text string*/
void lcdRestore(void){
lcd_gotoxy(1,1);
printf(LCD_PUTC,"Temperature ");
}
/*Display temperature at second line*/
void tempDisplay(void){
lcd_gotoxy(1,1);
printf(LCD_PUTC,"Set Temperature ");
lcd_gotoxy(1,2);
printf(LCD_PUTC,"%d %cC ",temp,degree);
}
/*Setting the temperature point to turn on
fan and store in EEPROM*/
void temperatureSetup(void){
/*Increment*/
if(INC){
temp+=1;
tempDisplay();
write_eeprom(0,temp);
delay_ms(500);
lcdRestore();
}
/*Decrement*/
if(DEC){
temp-=1;
tempDisplay();
write_eeprom(0,temp);
delay_ms(500);
lcdRestore();
}
}
void main(void){
int16 tempSetter;
/*Optional parameter for setting up
the internal oscillator*/
setup_oscillator(OSC_8MHz);
output_B(0x00);
output_A(0x00);
/*RA1 is output*/
set_tris_A(0xFD);
set_tris_b(0x00);
lcd_init();
pwm_on();
setup_adc_ports(sAN0|VREF_VREF);
setup_adc(adc_clock_internal);
set_adc_channel(0);
delay_ms(100);
lcdRestore();
delay_ms(100);
temp=read_eeprom(0);
while(1){
tempConvert();
temperatureSetup();
tempSetter=(int)temperature;
if(tempSetter>temp) output_high(pin_A1);
else output_low(pin_A1);
delay_ms(50);
}
}
I made a screen copy of this program.
 |
| A screen shot of this program |
The overall program requires 50% of Flash memory and 12% of on-chip RAM. For more efficiency, choosing another MCU with smaller flash size is a good option.
 |
| A successfully built program statistic |


This blog is incredibly insightful! The content is well-researched and presented in an engaging manner. I appreciate the valuable information shared. Keep up the great work, and I look forward to reading more!
ReplyDeleteHalltronics
Enrgtech
230 V ac Temperature Controller
Fantastic read! Your post offers fresh insights and presents the topic in a clear, engaging way. I appreciate the depth of information and the thoughtfulness behind it. This definitely gave me a new perspective. I’m excited to see more content like this. Keep up the great work! Enrgtech
ReplyDeleteTemperature Controllers