728x90

728x90

Tuesday, July 5, 2022

A Simple Two-Wire LCD Programming With Arduino Uno

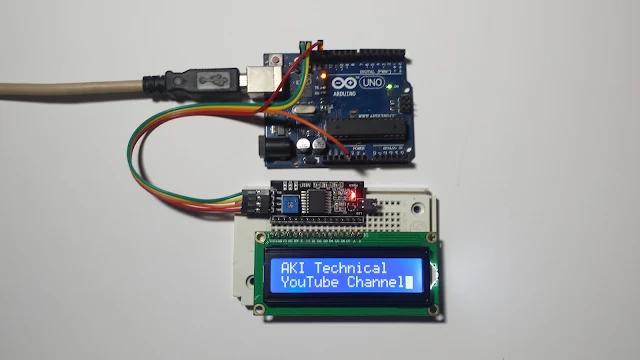
In this example, I use PCF8574T module that designed for character LCD interfacing. We can solder this module directly with the LCD. However I put either PCF8574T module and the LCD on a single breadboard.

A Simple Two-Wire LCD Programming With Arduino Uno

Running program

 The connection between the Arduino Uno and the two-wire display module uses only two communication wires, and two power supply pins.

  1. GND
  2. +5V (VDD)
  3. SCL connects to Arduino pin A5
  4. SDA connects to Arduino pin A4

It need the LiquidCrystal_I2C.h file that we need to install it. The program will show a simple text display with a little delay between each characters.

  1. //Two-Wire Library
  2. #include <Wire.h>
  3. #include <LiquidCrystal_I2C.h>
  4.  
  5. //LCD Setting
  6. LiquidCrystal_I2C lcd(0x27,16,2);
  7.  
  8. void setup(){
  9. //Initialize the LCD
  10. lcd.init();
  11. //Turn on the back light
  12. lcd.backlight();
  13. //Blink the cursor
  14. lcd.blink();
  15.  
  16. lcdShow("AKI Technical");
  17. lcd.setCursor(0,1);
  18. lcdShow("YouTube Channel");
  19. }
  20.  
  21. void lcdShow(char *txt){
  22. while(*txt){
  23. lcd.print(*txt++);
  24. delay(500);
  25. }
  26. }
  27.  
  28. void loop(){
  29.  
  30. }
  31.  

 Click here to download its source file.

We can use the ATMega32 to control a 3-Wire SPI LCD module (SN74HC595N chip).
No comments:

Post a Comment

320x50

Search This Blog

tyro-728x90