A character LCD with a 44780 LCD controller generally controlled by an MCU parallel port. Even the data transfer in-used is 4-bit mode, but it still require up to six MCU pins.
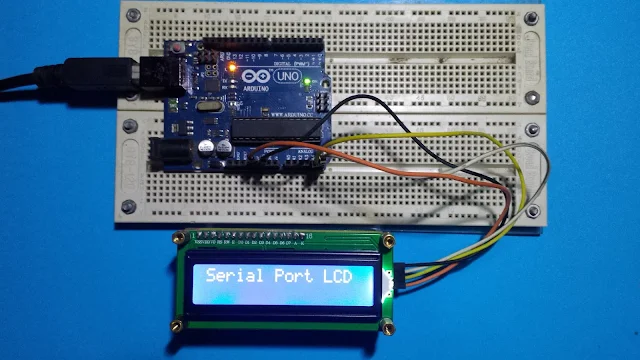 |
| A character LCD with PCF8574AP |
PCF8574AP is an 8-bit general purpose digital I/O expanding. We can read and write digital data between this device and a master MCU, or even controlling a parallel LCD module. However using an I2C IC bridge the master MCU uses only two pins of its digital I/O to interface to the LCD.
In online market the PCF8574AP is built in module the a character LCD that cost a few Dollars. For an electronics hobbyist like me, I only bought a single DIP version of this chip. I can program it to read/write digital data before I decide to put it with a character LCD.
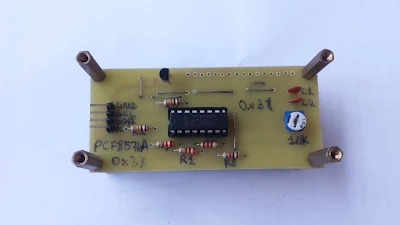
I decided to make my own I2C board module for my Arduino Uno board. This design follows the liquidCrystal_I2C LCD library from an author on GitHub. The overall design is not difference from the original one's but I made my own schematic and PCB design for my personal use.
I use Eagle CAD from Auto Desk software due to its richness of symbols and footprints library. The result yield with a small rectangular PCB module wired with PCF8574AP and a character LCD.
 |
| Schematic Diagram |
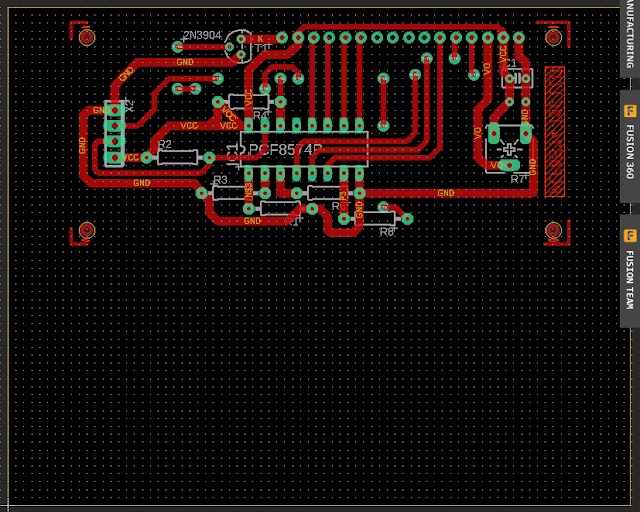 |
| PCB View |
This design example is fully worked as I have tested it with Arduino Uno using its library.
A zip file of this design could be download here.
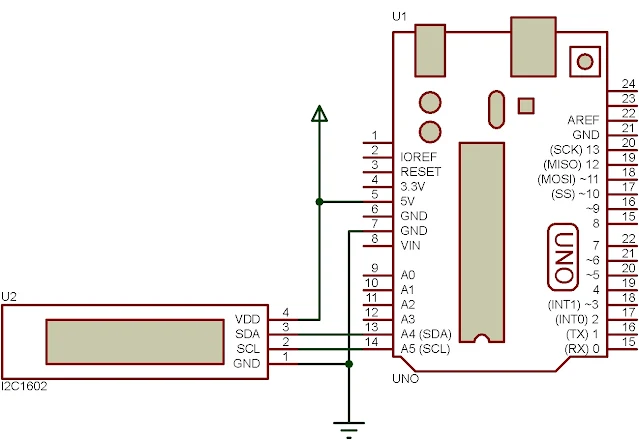 |
| Connection Diagram |
This Arduino sketch is from the library itself with some of my own modification.
#include <LiquidCrystal_I2C.h>
// set the LCD address to 0x38 for PCF8574A with A0 A1 A2 wired to GND
LiquidCrystal_I2C lcd(0x38,16,2);
void setup()
{
// initialize the lcd
lcd.init();
lcd.backlight();
lcd.clear();
Serial.begin(9600);
lcd.setCursor(0,0);
lcd.print("Serial Port LCD");
}
void loop()
{
// when characters arrive over the serial port...
if (Serial.available()) {
// wait a bit for the entire message to arrive
delay(100);
// clear the screen
lcd.clear();
// read all the available characters
while (Serial.available() > 0) {
// display each character to the LCD
lcd.write(Serial.read());
}
}
}
This sketch could be download here, or you can get from the library after the installation.

I think this is an informative post and it is very useful and knowledgeable. We provide LCD modules/LCD Displays, Graphic LCM, smart Display LCD, TFT LCM, Custom LCD Module Display, and LCD panels. china LCD Manufacturers.
ReplyDeletetft lcd screen