Overview Of SH1106 OLED 1.3 Inches OLED Graphical LCD Module
SH1106 is a single chip LCD driver with controller with multiple choice of interface. The commonly used interface is Inter-integrated Circuit (I2C) and Serial Peripheral Interface (SPI). Using I2C interface reduces the number of MCU pins to only two - SDA and SCL, with two more supply pins.
This small LCD module is suitable in an MP3 Player, mobile phone and calculator.
 |
| A Tested Program |
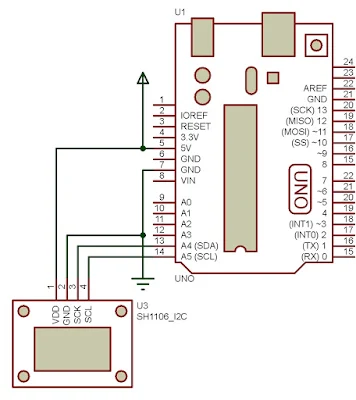
To connect to this module, we need to use four pins:
- VDD - +3.3V
- GND - Ground
- SCK - Serial Clock
- SDA - Serial Data
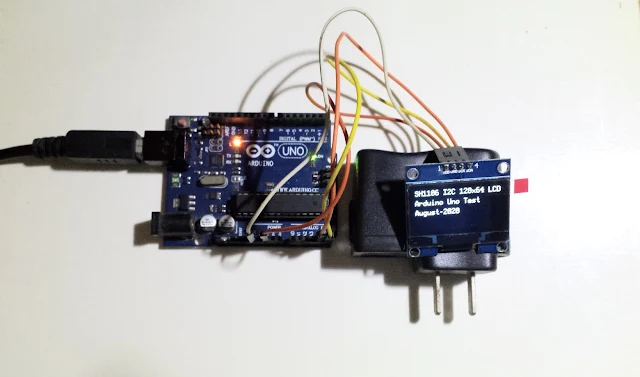
Here is a sample picture I took from the module I bought online.
Arduino Interfacing And Programming For SH1106
With the u8glib OLED LCD library developed by an author on Github, using this module is very straight forward. It comes with library and a lot of examples.
 |
| u8glib library installation for Arduino |
There are many library function for this device. I don't list them here all. The full specification is available on Github.
In Arduino we must include the "U8glib.h" . Note that the 128x64 graphical LCD starts from the 0,0 position at the upper left of the screen.
 |
| Starting point the display |
Second, we need to create the display object as follow,
U8GLIB_SH1106_128X64 u8g(U8G_I2C_OPT_NONE);
The argument commands the library to use I2C Interface.
There are some basic functions usage I need to use here:
setFont
This procedure sets the current font and reset the previous preferences. There are a lot of fonts in this library, click here to see. For more font click here. For example,
u8g.setFont(u8g_font_profont12); .
setPrintPos
This procedure set the point (x,y) on the screen for next writing. For example,
u8g.setPrintPos(0, 10)
This is a Print base class of the Arduino. For example,
u8g.print("SH1106 I2C 128x64 LCD");
firstPage
This procedure make the beginning of the picture loop. For example,
u8g.firstPage();
nextPage
This procedure make the end of picture loop body. It return 0 if the picture loop drawing is finish, otherwise a picture redraw is needed. For example,
u8g.nextPage();
Example Program
The HelloWorld example program come with the installed library. But I learn from it, and now I make my own text printing to the screen of this device.
 |
| Schematic Diagram |
 |
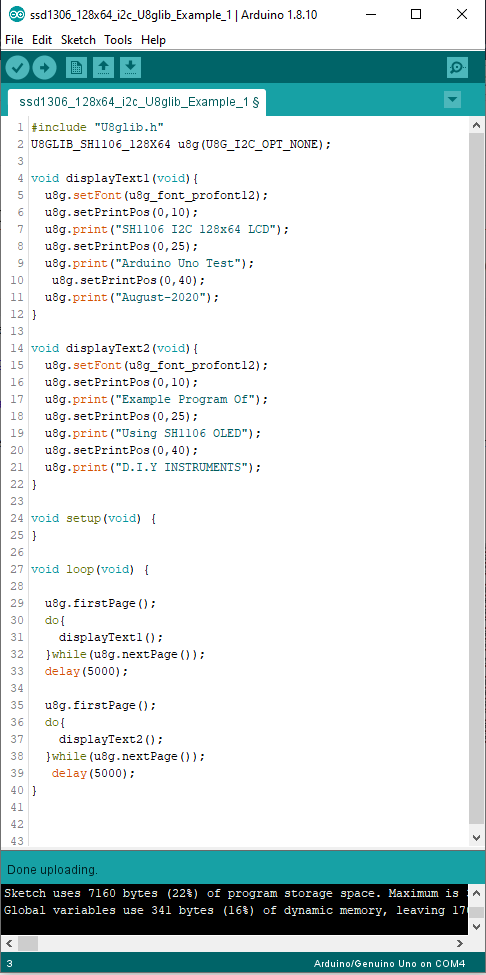
| Example Program |
Arduino sketch could be downloaded here.
#include "U8glib.h"
U8GLIB_SH1106_128X64 u8g(U8G_I2C_OPT_NONE);
void displayText1(void){
u8g.setFont(u8g_font_profont12);
u8g.setPrintPos(0,10);
u8g.print("SH1106 I2C 128x64 LCD");
u8g.setPrintPos(0,25);
u8g.print("Arduino Uno Test");
u8g.setPrintPos(0,40);
u8g.print("August-2020");
}
void displayText2(void){
u8g.setFont(u8g_font_profont12);
u8g.setPrintPos(0,10);
u8g.print("Example Program Of");
u8g.setPrintPos(0,25);
u8g.print("Using SH1106 OLED");
u8g.setPrintPos(0,40);
u8g.print("D.I.Y INSTRUMENTS");
}
void setup(void) {
}
void loop(void) {
u8g.firstPage();
do{
displayText1();
}while(u8g.nextPage());
delay(5000);
u8g.firstPage();
do{
displayText2();
}while(u8g.nextPage());
delay(5000);
}
Picture of this example:
 |
| A Tested Program |


No comments:
Post a Comment